|
Above: Preparing a layer of wood debris. I use cut up balsa, wood matches (removing the burner end), small
wood scraps, cork and cardboard. Paint several piles different shades of brown, and paint some the interior colors of the
buildings (blue, green or whatever). Simulate burned wood with an air brush and black pastels.
|
 |
|
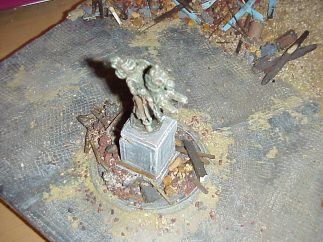
Above: The statue is glued in place. The street surface is done, and the first layer of debris is in place
around the buildings. The round "sidewalk" the statue base sits on is the top of a Folgers ground coffee can.
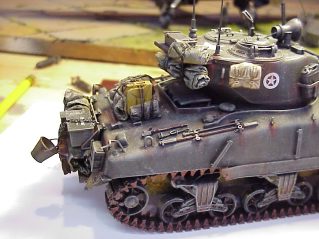
Above: The rear deck of the nearly completed Sherman. American tank crews were notorious for cramming as
much extra equipment on their vehicles as possible. I have added a rear "shelf" to the back of the Sherman's engine compartment
and turret to carry extra equipment - a very common field modification during WWII. The bedrolls are made of Kleenex,
the straps from car pinstripe tape, the boxes from sheet plastic.
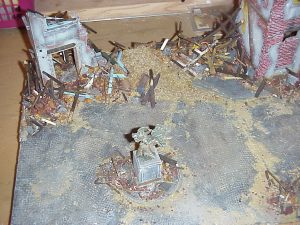
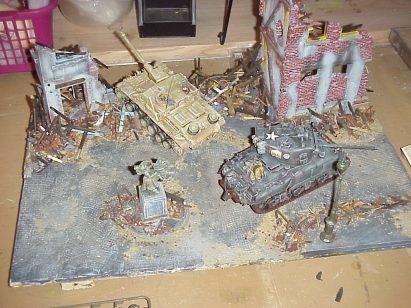
Above: The diorama base, with the 3 major componenets glued in place and with the first layer of debris.
The seams between the clay sections of street are filled in with colored Celluclay. Note that I have not yet added the extra
two inches to the left side of the base that would eventually hold the extra German troops.
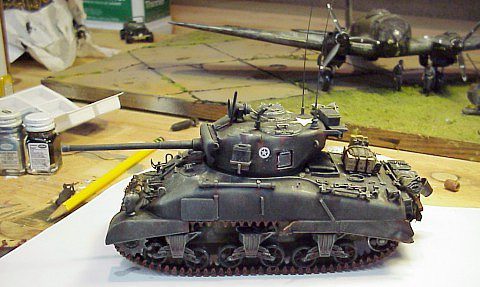
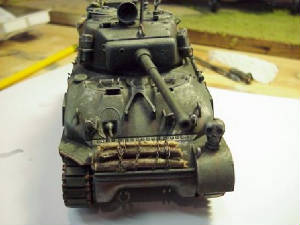
Above: The Sherman is nearly done. Remaining details are the extra side log armor, assorted crew equipment
and final weathering. In the background is my son's HE-111.
PREVIOUS PAGE
NEXT PAGE
|
|
|
|
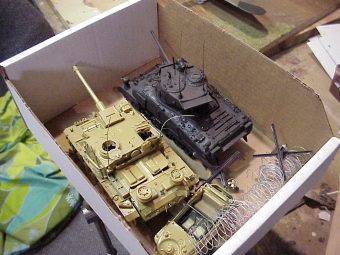
Above - The three completed vehicles, awaiting the final dark wash, dry brushing, their equipment and final
weathering. Note that any destruction should be planned BEFORE assembly. The Sturmer already has open hatches, buckled engine
plates and, not visible here, entry holes from the shells that finished it off. The VW is packed with extra details, as the
original model was sparse to say the least. The Sherman was originally planned to be shown "buttoned up" (all hatches closed
for street fighting), but without at least the tank commander, the tank lacked personality - so I added him.
|
|
|
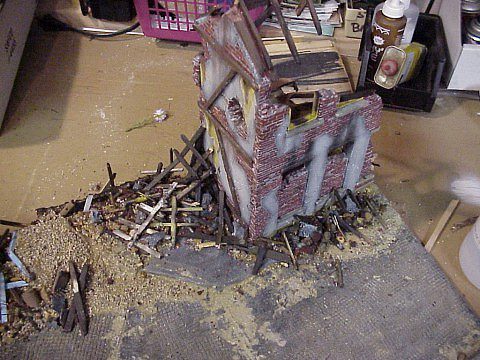
Above: The ruined house , almost done and glued in place on the balsa wood sidewalk. The first two layers
of debris are in place. The mound that the knocked out Sturmer will sit on is to the left. Even though Verlinden houses
come with "wooden" ribs already cast in the plaster walls, I always remove these with a Dremel tool and glue real wood
in their place.
Above: The front of the nearly completed Sherman. The extra log armor is held in place by chain (I use simple
cable neckchains). This crew is big time into terrorizing the Germans; in addition to the skull, they have a loud speaker
on top of the turret to play music or yell at the Germans in battle. I got the idea from the movie "Kelly's Heroes".
Above: The initial layout called for the action to move right. I changed this to action left, and had to
add a 2 inch section to the left side of the base to accomodate the VW and the extra Germans behind the building to the
left.
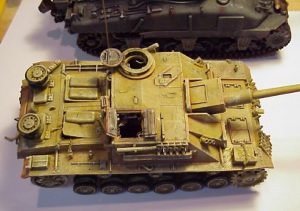
Above: The Stug is ready for a final wash. Note again that the damage, including the buckled engine plates,
is already done.
|
|