MILITARY DIORAMAS by Paul Asaban

Photo Album 35 - Restoration Project III

Home
About me
Photo Album 1 - The Road to Minsk
Photo Album 2- The Road to Minsk
Photo Album 3 - The Road to Minsk
Photo Album 4- OS2U Kingfisher
Photo Album 5 - Flakvierling
Photo Album 6 - Building the Flakvierling
Photo Album 7 - Dauntless SBD
Photo Album 8 - Dauntless SBD
Photo Album 9 - Channel Gazing
Photo Album 10 - Stuka and Matilda
Photo Album 11- ME-109 and Spitfire V
Photo Album 12 - Anzio
Photo Album 13 - Anzio
Photo Album 14 - Bastogne Aftermath
Photo Album 15 - Normandy Ambush & more
Photo Album 16 - The First Time I Saw Paris
Photo Album 17- Aachen 1944
Photo Album 18 - Aachen 1944
Photo Album 19 - PT109
Photo Album 20 - "Corner Kick" Curtiss P-40
Photo Album 21 - Building "Corner Kick"
Photo Album 22 - Black Widow
Photo Album 23 - Assorted models
Photo Album 24 - Somewhere in Saudi (A-10)
Photo Album 25 - Top Gun Air Show
Photo Album 26 - Top Gun Airshow 2
Photo Album 27 - The Mother of all Battles
Photo Album 28 - The First Night - F-111
Photo Album 29 - My kids are in on the action - Christian's Dioramas
Photo Album 30 - My kids are in on the action - Nicole's Dinosaurs
Photo Album 31 - Coming Soon - Operation Market Garden
Photo Album 32 - The War Room
Photo Album 33 - Antique Ships Restoration Project
Photo Album 34 - Restoration Project II
Photo Album 35 - Restoration Project III
Photo Album 36 - Restoration Project IV
Contact Me
Related Links

The Santa Maria
The finished, restored ship lies on my war room floor, waiting to go back to her perch in the Old Europe Restaurant.

SantaMariaafter.JPG

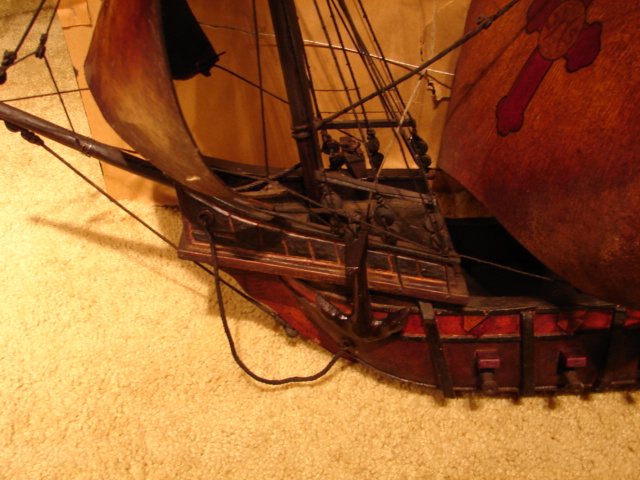
BELOW: The Santa Maria's bow. After the intense wash, this ship had lost most of her color. I experimented with mixed tints of stain and paints to bring back her beauty as best I could. Her bow was actually craked in half from dry rot, so I had to sand down the jagged edges and fill the crack in with filler. I sanded down the whole fore deck, restained it, and here it is. Once the ship was done, I sealed her in a very thin coat of polyurethane.

SantaMafter2.JPG

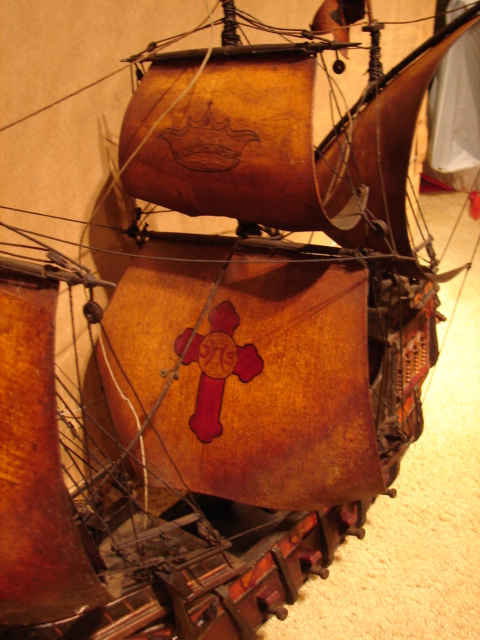
Below: The Santa Maria's sails. Before washing, the decorations on the sails were virtually invisible. Believe it or not, these sails are made of wood. I took cotton cloth squares that I use to clean my guns and gently swabbed her sails down with antique wood cleaner. I then wiped off the residue with clean swabs, and oiled the sails with tung oil to give them some moisture. When dry, I sealed the sails.

SantaMariaafter3.JPG

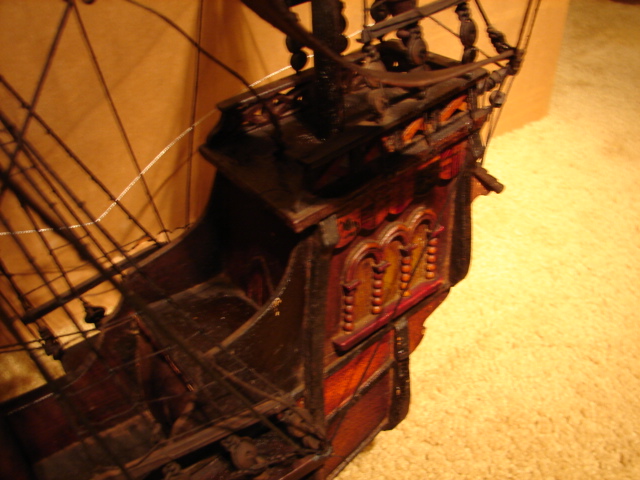
BELOW: Her aft section. All the coloring on her woodwork had vanished, with only a hint of the true colors remaining - just enough for me to color match with paints and stains. I made several attempts to repair her rigging, but it was so brittle and dry that I damaged more than I fixed. Using my air brush, I oiled the rigging down to add moisture and then left well enough alone.

SantaMafter.JPG

Next Page

Previous Page