|
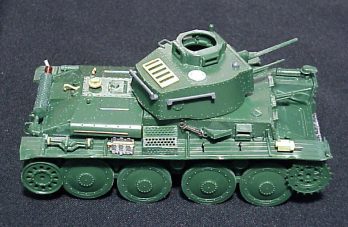
This is the Pz38T prepaint. You can see the added details - just look for any parts that are not the original
green plastic. These parts include a "wood" pallet on the turret, real metal exhaust parts, tools from assorted tank kits,
extra bolt on handles for attaching equipment and more. Since most armor was modified in the field according to the needs
of the crew and the particular campaign, there is no set rule for "add ons" - for me, this has always been one of my favorite aspects
of modeling.
|
 |
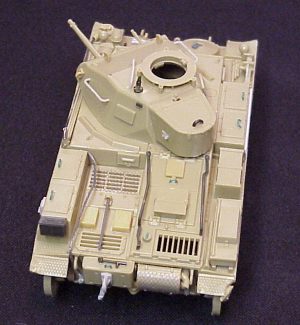
Here is the Panzer II prepaint. Again, the added details can be seen contrasting the original plastic. Note
the grid on the exhaust and over the engine intake - this is a simple trick using fabric "tool" that is glued on with liquid
glue. "Tool" is available from any fabric store and is inexpensive. Once painted and drybrushed, this little "super detail"
can add a lot to your model. Fabric "tool" can also be used to simulate metal grate, filter covers for engine intakes and
many more items.
|
|
|
|
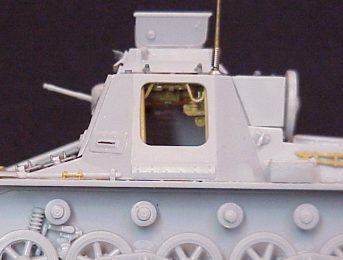
A view inside the Command Armored Vehicle. Since the door will be open in the model, interior details
were called for. These can be simulated with parts from your "junk" box, small wiring and assorted metal parts. Jewelry assembly
parts are very useful and available from most craft stores.
PREVIOUS PAGE
NEXT PAGE
|
|
|
|
|
|
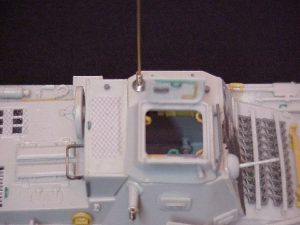
A top view inside the Command Tank. The antenna base is the cup from a stud earring finding, and the spring
is also a jewelry assembly part. Note the "tool" added to the turret deck to simulate thin metal grate often used as an anti
slip surface. The holder for a jerrycan on the back face of the cabin is a simple office staple, another of my favorite little
add ons.
|
|