|
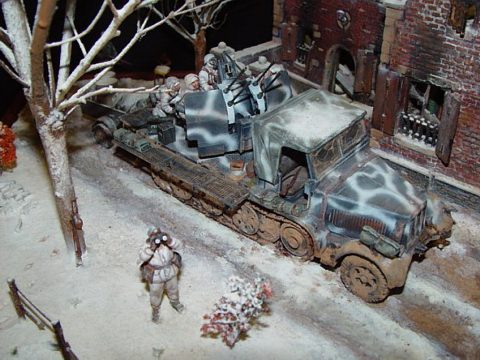
Above: My latest model, an 8-ton German halftrack built by the Krauss-Maffei motorworks in Munich. The model
kit is from Tamiya, the house is a Verlinden product. The Germans used the chassis of this vehicle for many variants,
including troop transport, gun tractor, and in this case, a mobile AA battery. In this diorama of the Battle of the Bulge,
the skies are finally clearing just before Christmas, 1944, and Allied planes are back in the air, hence the name of the diorama.
|
 |
|
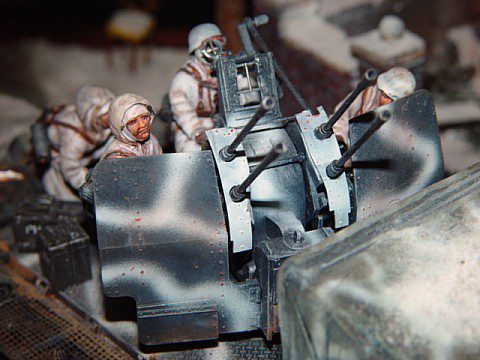
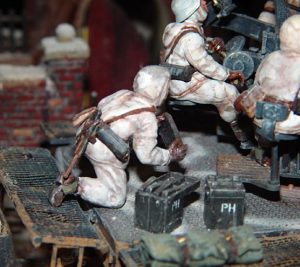
Above: The gun crew and their weapon, the excellent 1940 design of the magazine fed 20mm AA gun. The gun
aimer sits directly behind the weapon, and controls angle and elevation with 2 rotating wheels. On either side of him, loaders
feed the ammo clips into the gun. Behind, another crewman feeds the ammunition to the loaders. The loader to the left
shows the stress of war on his face. By raising the eyebrows a bit, and accenting dark areas around the eyes, jowls and above
the chin, a fatigued look can be achieved. Practice, practice, practice. I always remember what I learned from Shep Paine:
a well painted face can save a mediocre body, but a well painted body cannot save a poorly painted face.
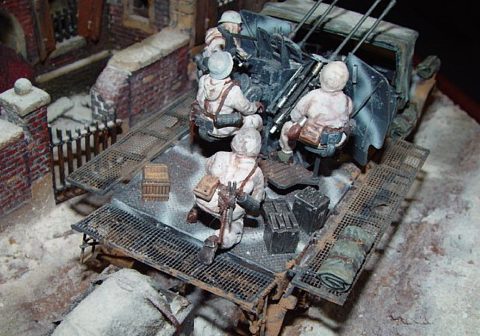
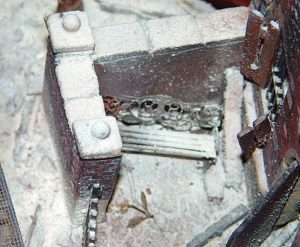
Above and right: A rear view of the vehicle. The side panels and rear gate come down when the gun is
in action, and hinge upwards when the vehicle is moving. The ammunition handler and extra ammo boxes are clearly visible.
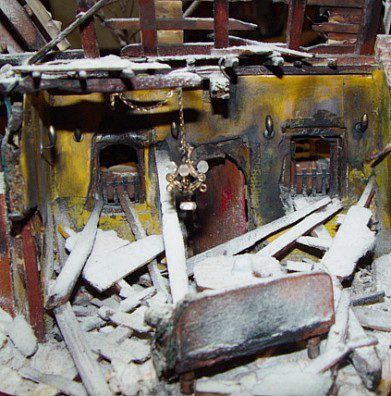
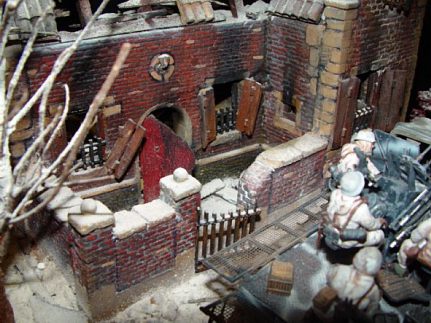
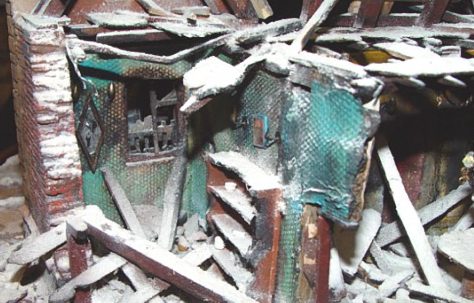
Above: What was once a charming living room has been turned to cold debris. A couch has survived, as has
a chandelier and some wall sconces. The chances of the chandelier surviving the destruction and/or looters is slim to none
- I just like making them and they add a nice touch. Barely visible is a table in front of the couch, with an abandoned German
helmet and canteen - proof of a pause of war for some German soldier in some past forgotten moment. The chandelier is made
of gold plated earring parts, and the light housings are real crystal beads.
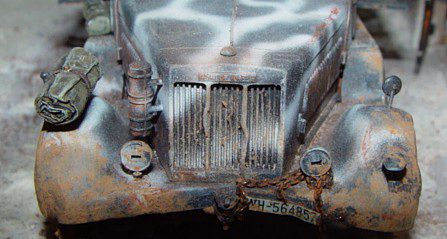
Above: The beaten and weathered front of the half track, including the license plate. The tarp to the left
is made of Kleenex.
Above: The front of the Verlinden farmhouse. The gate is a doll house iron gate, the lamp above
the door is real crystal, and the ironwork in the windows is OO train track. The doors, shutters, roofing and everything added
to the house is scratch built.
PREVIOUS PAGE
NEXT PAGE
|
|
|
|
Above: A close up of the Flakvierling and the crew commander scanning the skies for enemy aircraft. The trailer
behind the half track is scratch built, and carries captured US fuel and supplies. The commander's rifle and canteen are by
the tree. The trees are dead sections from my azalea bushes, with many extra branches drilled and glued in place. The snow
is baking powder. The mud on the tracks and road is real mud. When dry, coat the mud with dull coat. Ice on the road is simulated
with diluted white paint covered with gloss coat.
|
|
|
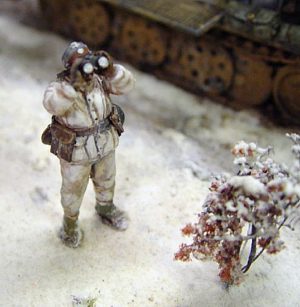
Above: The crew commander looks for enemy aircraft. He wears standard winter camoulflage for the Wehrmacht.
On his belt is a map case on the left, a Luger holster on the right. His boots have cloth wrapped around them for extra warmth.
Ice and snow cling to his boots, giving his feet an unnaturally oversized look. Every little detail adds to a diorama
- no detail is irrelevant. Note the footprints in the snow.
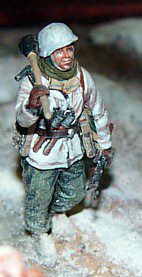
Above: A tired and wind burned soldier trudges through the ice and snow behind the half track. He carries
a Panzerfaust over his shoulder, a precursor of today's Rocket Propelled Grenade (RPG). In his belt, the standard "potato
masher" German grenades. In his left hand, the world's first true assault rifle, the fabulous MP-44.
Above: A close up of the courtyard of the farmhouse. A wrought iron park bench sits abandoned and covered
in snow.
Above: The dining room. Broken china sits on the shelves to the right, and a shattered mirror is on the far
wall. The mirror frame is from an earring part, but you can use almost anything. Cut out a small plastic piece of the same
shape as the chosen frame and paint it black, and then glue aluminum foil on it. Glue this assembly to the back of the
frame. When dry, "break" the mirror by cutting out sections of the foil with an exacto knife. A lone family portrait still
hangs on the wall.
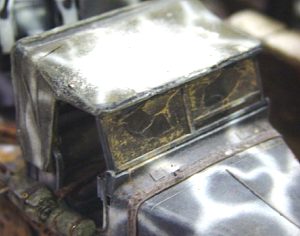
Above: The cab section of the half track. Mud on the windshield has been cleared away by the wipers, leaving
clear wiper marks on the windshield. How is this done? Take a small section of clear tape and affix it to a piece of flat
plastic. Carefully scribe two windshield "tracks" with an exacto knife. Remove the two cut outs, and stick them on
the windshield in the appropriate places. Soak an old brush in actual mud or acrylic paint diluted with water. (DO NOT use
lacquer paint thinned with turpentine - you will eat away the tape and ruin the windshield.) Brush the windshield and let
dry. Remove the tape, add the actual wipers in place, and you're done!
...and don't forget that every vehicle has wipers that track differently! Do your homework!!
|
|